Tuesday, March 31, 2015

Red Apple Lipstick Makeup Review


Straight out of the box with a hand written note!

Red Apple Lipstick took the natural beauty world by storm with their gluten free lipsticks. Not only is this company great for a person with Celiac Disease but R.A.L. is great for anyone conscious of the ingredients in their beauty products. After seeing countless YouTube and blog reviews I broke down and bought two lipsticks and a complete customizable eyeshadow pallet with nine handpicked colors by yours truly. Along with the Z-Palette I bought a small pallet for two eyeshadows to use while on the go. I also received a sample of another lipstick with my purchase. In one of my Vegan Cuts Beauty Boxes I got a Red Apple lipstick so I am adding it to this review. I'm going to give you my honest review of all the products along with swatches. 

I love the green and black color scheme.
 
 
The green and apple print Collector Edition Z-Palette ($20) is a magnetic case made out of a sturdy paper material. This palette can hold up to nine eyeshadows. Each individual eyeshadow cost $18.75 but if you buy multiples you can get discounts. For 9 the average is around $13-14 each. The eyeshadow colors I bought are as follows (top left to bottom right): Black Magic, Graphite Glam, Indi-go-go, Olive This Color, Violet Vintage, Lucky Penny, Like U Latte, Pixie Dust and Buttercream. I tried to get one from every color group and cover the basics. 


The Twosie Eyeshadow Holder ($6.95) carries two eyeshadows and is perfect for traveling. A negative is how the eyeshadows fall out if you turn the compact upside down when opened. I wish it had magnets to hold the pans in place. Also, the look of this compact could be more original but it does the job.


With R.A.L.'s large color selection it was hard to narrow down what colors I wanted to buy. I decided to purchase two colors that were unlike anything I had in my lipstick collection and stayed away from neutral colors. I bought Pinkle Twinkle which is a purple pink color. I wanted a purple lipstick that wasn't too over the top and once I saw Jenna from Natural Beautiful Life wearing this color in this video I experienced Lipstick Love at first sight. The second color I picked was Sunkissed which is a gorgeous orange. I've seen quite a few people wearing orange lipstick and love the way it looks. Each lipstick is $23.50 but I got a Bogo Buy One Get One Free! I love the packaging for these lipsticks. The textured bottom takes an ordinary black lipstick tube up a notch by adding a classy and edgy touch. The sample is Berry Blast which looks like a sparkly berry mauve lipstick. I try to stay away from any lipstick with sparkle (and lip gloss) but found this did not apply that way.


Meet Audrey. Out of all the lipsticks in Red Apple's lipstick box she seems to be the most popular. Audrey fits in with any crowd and is the girl next door. If you are trying to pick one color to start out with this is it! Aubrey works for most skin types and will be the pink cherry on top of your makeup look. I'm so glad I got this in my Vegan Cuts box. While I made riskier color choices with my own purchase I really wanted to try this color. All my favorite natural YouTubers were gushing about Audrey. 

I hope you guys check out Red Apple Lipstick the next time you are in need of new makeup. Not only do they have lipsticks and eye shadows but they have a mascara that has been raved about, lip glosses, an eye primer, lip liners and eyeliners. Their product line is continuing to expand so keep an eye out! Check out the swatches below and let me know what your favorite Red Apple Lipstick items are or what you plan to try! Follow this link to sign up for Red Apple Lipsticks VIP Coupon Club. You will receive an email with your first coupon code just for signing up!
 
Lipstick Swatches:

 
From left to right they are Pinkle Twinkle, Audrey, Berry Blast and Sunkissed
 
Lipsticks on Lips:
 
Pinkle Twinkle

I really like Pinkle Twinkle in the picture but in person I am not 100% in love. This lipstick plays with light so I need to make sure I don't apply too much. The color shows up better if you lighten your lips with concealer or foundation. I would love a lip pencil to go with this because I think it would make the application smoother.

Audrey

This is simply the perfect lipstick. While all R.A.L's lipsticks are creamy, Audrey glides on smooth and with one quick swipe my lips are ready to go. I've never used a lipstick where the application was so easy!
 
Berry Blast

Berry Blast doesn't seem to look much different from Audrey in the picture but it has a darker berry hue where Audrey is pinker. I am not a fan of berry shades on myself and prefer pinks, true reds or brown reds.
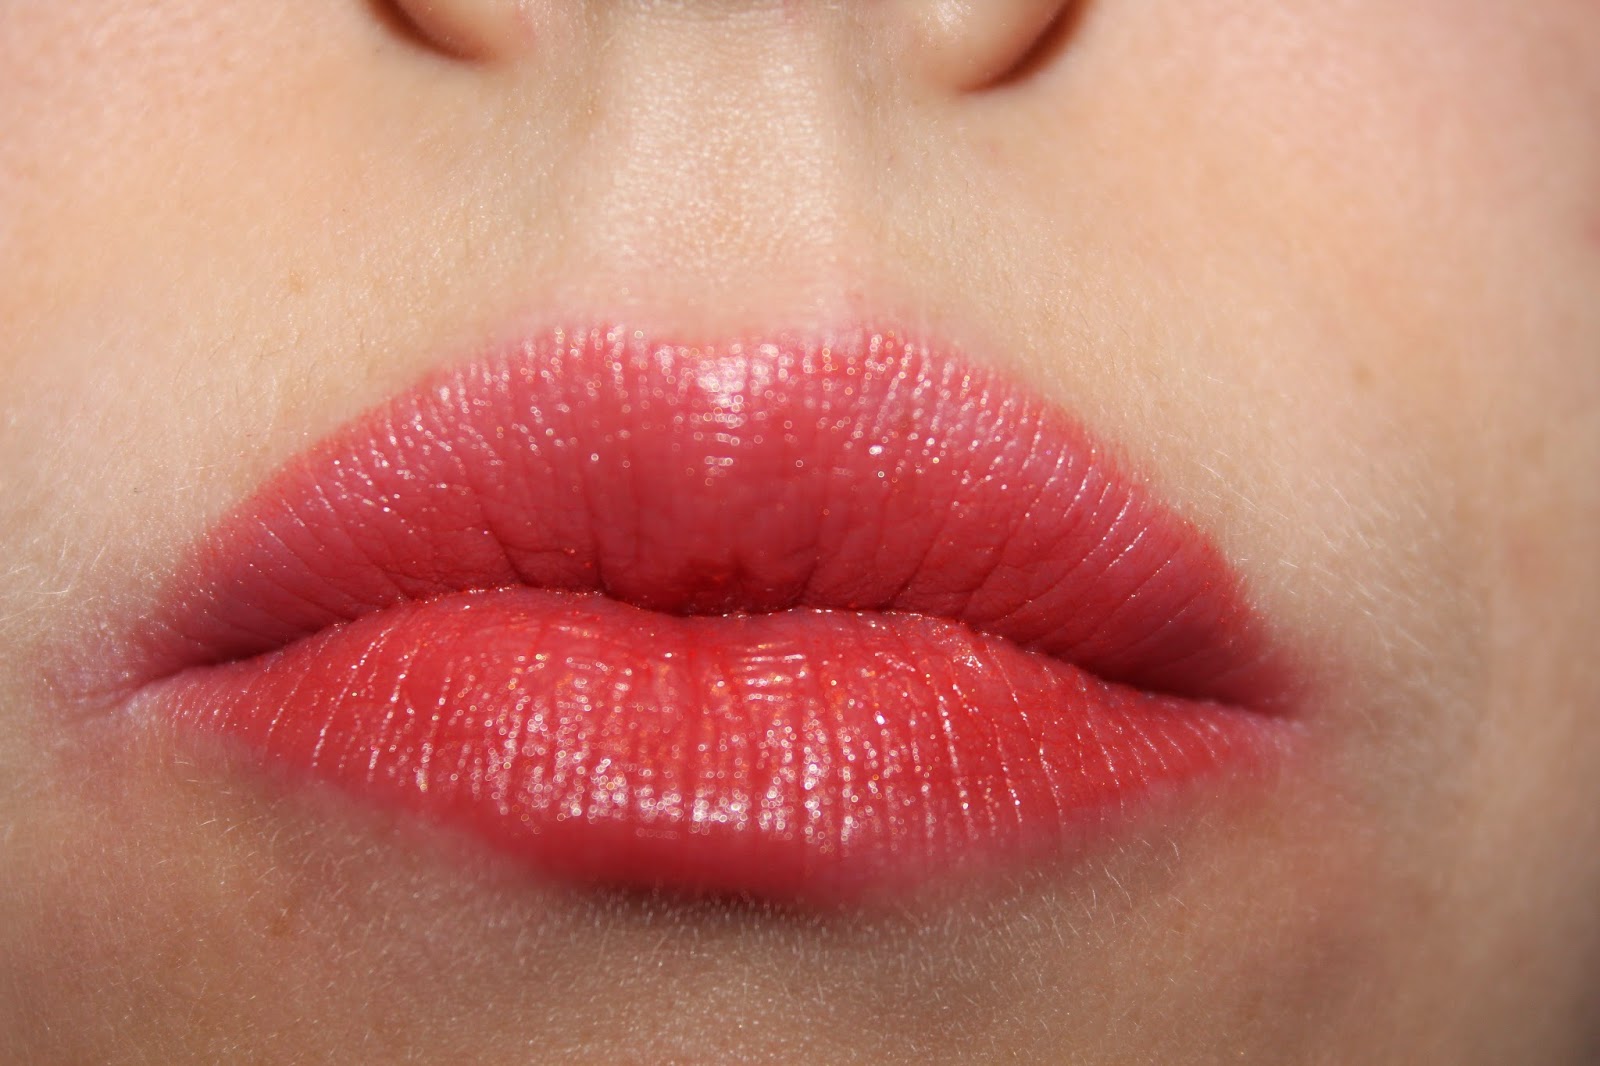
Sunkissed

I am so happy I got an orange lipstick and wish I could have taken a picture showing Sunkissed's true color! In person Sunkissed is between the swatch color and the picture above. This was my second favorite.

Eyeshadow Swatches:


These are the darker/colorful eyeshadow swatches. From left to right they are Violet Vintage, Olive This Color, Indi-go-go, Graphite Glam and Black Magic
 
 
These are the lighter/brown eyeshadow swatches. From left to right they are Buttercream, Pixie Dust, Like U Latte and Lucky Penny
 
Eyeshadow Looks:
 

Olive This Color and Like U Latte on lid, Lucky Penny as eyeliner and Buttercream in inner corner

 
Pixie Dust and Violet Vintage on lid, Graphite Glam as eyeliner and Buttercream under brow and inner corners
 

Indi-go-go and Lucky Penny on lid, Black Magic as eyeliner and Buttercream under brow and inner corners
 
Eyeshadow Review: First off, I want to start out by saying I am not the best makeup artist. Second, I did not use an eye primer which I need! I think things would have gone much more smoothly using a primer and luckily R.A.L. has one! Without an eye primer I found most of the colorful eyeshadows didn't show up very well dry. I did not want a cakey look so I tried them wet and liked this much better. The one color I was not impressed with was Like U Latte. I think it just blends in with my skin color too much. I also didn't like all the fall out I got from Lucky Penny so I will have to make sure to do my eye look first when using this lovely color. Indi-go-go seemed to put the color where I didn't want it (drift) until I used it wet. One thing I loved is how the eyeshadows did not crease which is normally a problem for me. Most of the colors lasted except Olive This Color. Over all these are not my favorite eyeshadows but I love how they are pressed. Most other brands with natural eyeshadow have loose mineral powders. I really need to try these with a primer and redo my review. I am willing to try more colors, especially neutrals, before I decide if I love these eyeshadows. 
 
What products do you plan on trying from Red Apple Lipstick? Don't forget to sign up here for Red Apple Lipsticks VIP Coupon Club and receive you first coupon code! Comment below and follow my blog for more natural product reviews and much more!

Tuesday, March 24, 2015

DIY: Earthpaste Toothpaste Recipe


Welcome to the first part of a three part series on dental health! I hope to get you thinking, researching and trying out safer alternatives for your oral hygiene. One of the first things I switched when making the change to more natural beauty and hygiene products was toothpaste. I had always thought toothpaste tasted chemically but did not think much of it because I believed I was doing the right thing for my oral health. Further research into the ingredients and purpose of toothpaste showed me I was being deceived by what the world around me was saying was correct. Toothpaste is merrily a tooth polish and the actual brushing action along with the important addition of flossing helps keep bacteria and plaque at bay. With that being said, I believe this recipe will actually be beneficial for your teeth and gums. Below, after the recipe, I will list the benefits for each ingredient. 

The first natural toothpaste I tried was Earthpaste. I went for the best ingredients I could find and this toothpaste has them. I liked Earthpaste but it did not always make my breath as fresh as it was with conventional toothpaste. I found a recipe for Earthpaste and decide to try it out because it was so much cheaper to make. A bonus was all the ingredients could be used in other product recipes. I ended up liking the DIY recipe even better than the original and have since added a few ingredients to strengthen it's cleaning and breath freshening power!

 
Before the recipe I want to go over the ingredients from a more recognizable and conventional toothpaste brand. I am going to explain why each ingredient is in the toothpaste.

Ingredients:
Sodium Fluoride: Prevents tooth decay and plaque
Inactive ingredients:
Sorbitol: Flavoring Agent and Humectant
Water
Hydrated silica: Abrasive, absorbent and viscosity controlling
PEG-6: Humectant and solvent
Sodium lauryl sulfate: Denaturant, surfactant, cleansing agent, emulsifying, foaming.
Zinc citrate: Biocide
Cellulose gum: Binder, emulsion stabilizer, film former, viscosity increasing agent
Sodium saccharin: Flavoring agent
Carrageenan: Masking agent
Glycerin: Denaturant, humectant, viscosity decreasing agent, solvent
Hydroxyethyl cellulose: Binder, emulsion stabilizer, film former, viscosity increasing agent
Sodium citrate: pH adjuster, buffering, chelating, masking
Stannous chloride: Reducing
Polysorbate 80: Denaturant, surfactant, emulsifying agent, solubilizing agent
Sodium benzoate: Preservative, anticorrosive, masking
Cetylpryidinium chloride: Antiseptic
Benzoic acid: pH Adjuster, preservative, bulking, masking
Polyethylene: Abrasive, adhesive, binder, bulking agent, emulsion stabilizer, film former, viscosity increasing agent
Iron oxides: Colorant
Titanium dioxide: Colorant, opacifying agent, ultraviolet light absorber
Blue 1, Blue 1 lake, Yellow 10 lake and Yellow 5: Colorants

From the ingredient's list I have concluded the Sodium Fluoride, Zinc Citrate and Cetylpryidinium chloride have properties that are actually meant to help keep your teeth safe from decay, plaque and bacteria. The preservatives, ingredients to help the stability, colorants and abrasives are unneeded. This Earthpaste recipe is free from modern day chemicals and only uses natural ingredients used throughout history. This recipe last without a preservative for the entire time it takes to use the toothpaste. The ingredients never have to be mixed after making the recipe. While the color is a light brown and the toothpaste doesn't foam in your mouth, this just takes some getting used to. The ingredients below are antiseptic, antibacterial, antiviral, prevent tooth decay and plaque all while tasting great! 


Earthpaste Toothpaste Ingredients:
Glass Container. (Jar from Hobby Lobby)
¼ cup Redmond Clay (Bentonite Clay)
¼ tsp. Real Salt or Himalayan Pink Sea Salt
2 tbsp. Xylitol
1-2 tbsp. Coconut Oil (taste dependent)
10 drops Peppermint Essential Oil (I only had Peppermint Extract)
5 drops Cinnamon Leaf Essential Oil
3 drops Tea Tree Essential Oil
2 drops Clove Bud Essential Oil
3-6 tbsp. Distilled Water (more/less for desired thickness)

Optional ingredients:
1-2 tbsp. Baking Soda 
20-30 drops Trace Minerals (Recommended by Wellness Mama to help with remineralization)
Flavor Options:
Spearmint, Lemon, Lime, Sweet Orange, Mandarin Orange, and Tangerine.
(Recipe based off Earthpaste ingredients and this recipe)
 
Mix Coconut Oil with all the Essential Oils in the glass container. This acts as a carrier and dilutes the EO's. If the Coconut Oil is hard place the jar in warm water to aid in mixing. Add Clay, Salt, Xylitol and 3 tablespoons water and mix.  Add more water, a tablespoon at a time, until you get the paste consistency you want. If the toothpaste clumps together instead of being smooth you do not have enough water.

*Do not use metal (or plastic if able) when using clay. Mix with a wood utensil (I use a chop stick) and keep the toothpaste in glass.

**Always check the safety of essential oils especially if you are pregnant or using the product on children. Check here, here and here for more information. Unfortunately, websites give conflicting information. The first website does not list any of the ingredients above as ones to avoid while pregnant while the second and third says to avoid cinnamon, clove and peppermint. Personally, I would stay away from most essential oils while pregnant or with children just to be safe. Try using the leaf or extract form instead. Xylitol (even small amounts) and tea tree essential oil are toxic to dogs so always keep these away from your pet family.


Benefits of Ingredients:
Xylitol: non-fermentable making an environment that is inhospitable to bacteria and inhibits plaque formation (keep away from dogs!)
Peppermint Essential Oil: antibacterial, helps with bad breath, gum infections, oral inflammation and prevents gingivitis
Cinnamon Leaf Essential Oil: antiseptic and antibacterial
Tea Tree Essential Oil: antibacterial, antiviral and fights gingivitis and plaque (toxic to dogs)
Clove Bud Essential Oil: antibacterial and antiseptic
Coconut Oil: antibacterial
Salt: antibacterial and taste
Bentonite Clay: light abrasive and antibacterial 


Monday, March 9, 2015

DIY: Holy Grail Natural Deodorant Recipe


I recently found my favorite deodorant in the world! Yay! Of course, it was natural because we all know most commercial deodorants are horrible for you thanks to aluminum-based compounds and many other toxic chemicals. I was so excited but the cost put a damper on my happiness. Broken down, the deodorant was $5.83 vs. the $3.40 per oz. for my second favorite natural deodorant. When I read the ingredients list I thought "I can do this, I can make this!" I already had all but one of the ingredients, which was arrowroot powder. I had no problem buying this because I've been wanting to experiment with making a dry shampoo. 


I added the contents of two probiotic capsules thanks to a few recipes I found online. My second favorite natural deodorant has Saccharomyces Ferment and the probiotics are meant to serve the same purpose. They hopefully replace unwanted smelly bacteria with good bacteria. Coconut oil and lavender are antibacterial so I'm not sure if the probiotic ends up being ineffective. (I need a biologist to perform some test!) The clay and arrowroot powder help with moisture and the baking soda neutralizes body odor. Jojoba oil is rich in vitamin E, bacteria resistant and helps aids in absorption. Shea butter helps moisturize and is noncomedogenic. This is now my HOLY GRAIL DEODORANT!!!


What you need:
Glass Jar
½ cup Arrowroot Powder
¼ cup Baking Soda
¼ cup Coconut Oil
¼ cup Shea Butter
2 tbsp. Bentonite Clay (Kaolin Clay was in original recipe)
2 tbsp. Jojoba Oil
20-40 drops Lavender Essential Oil

2-3 Probiotic Capsules (optional)


Add the Arrowroot Powder, Baking Soda, Bentonite Clay and the inside of the Probiotic Capsules to the glass jar. Heat the Coconut Oil and Shea Butter until melted in a double boiler. Take off the heat and replace the hot water in your pot with cold water. Stir the oil to cool down. When it is warm to the touch mix in the Jojoba Oil and Lavender Essential Oil. Add the oil mixture to the glass jar while continuously stirring. Mix well. Put in the refrigerator to set up. Use a pea sized amount and allow the deodorant to absorb into the skin before putting on clothes. Makes 1 ½ cups. 


Scents: If you want to play around with the scent try using LemonLemongrassLimeMyrrhTea Tree or Rose Otto (pricey) to help prevent bacteria. You could also use cocoa butter for a chocolate smell, extracts and other EO's. Play around and have fun with your pits!

Sensitivities: If you have a sensitivity to Baking Soda or clay you can replace these with an equal amount of Arrowroot Powder. You can also replace the Bentonite Clay (for oily skin, most absorbent and the harshest) with European Clay Powder (normal skin) or Moroccan Red Clay Powder (for sensitive skin and least absorbent). Corn Starch can also replace the clay (unsure of harshness vs. clay). If you are worried about the Coconut Oil and/or Jojoba Oil clogging your pores replace with more Shea Butter (comedogenic ratings). This will change the consistency but the deodorant will still work. Detoxing your arm pits before using natural deodorants will help with the transition. You can use clay and apple cider vinegar to make a paste and let dry. This also makes a great mask. Feel free to do this occasionally for continued benefits.


Run down on the cost of ingredients and cost per ounce:
If you bought the ingredients on Vitacost you would spend under $70 without the probiotic. You have to buy two Bob's Red Mill arrowroot powders and baking sodas plus I added the largest Vitacost coconut oil into the price so your total could be much cheaper. Since this recipe makes around 1 ½ cups it is roughly 12 ounces. The shea butter will last for three recipes (ingredient used up first). This means you will get at least 36 oz. and pay at most $1.94 per oz. Many of the ingredients will be able to be used for more than three recipes and everything can be used for other DIY's.


What are your favorite natural deodorants? Let me know if you plan on trying out my recipe and if you make any changes let us know! Subscribe to my blog for more recipes, comment and share with your friends! Have a great non smelly day!


More information for shopping online:

I love shopping on VITACOST for almost everything: healthy food, supplements, bath and beauty products. You can get most things for a fraction of the price compared to Whole Foods and other health stores. You get free shipping if you spend $49.

Vitacost: Save $10 of your first order of $30 if you click the link: http://goo.gl/y0hE3P

If you shop online ANYWHERE you should sign up with Ebates, Extrabux and Topcashback to get cash back. When shopping check each and see who is giving more cash back. Once you find the one that will help you save the most, click on their link to the store and shop away. It's that easy! Click the links below to get extra perks.

EBATES: Get a $10 gift card to selected store or $5 Ebates credit when you sign up
http://www.ebates.com/rf.doreferrerid=M%2Bjpv3oqEBO9H419PZMFVg%3D%3D&eeid=26471
EXTRABUX: Get an additional $5 cash bonus when you sign up http://www.extrabux.com/r/538ca48a12
TOPCASHBACK: Get an additional $10 cash bonus when you sign up http://www.topcashback.com/ref/member112513373322

Thursday, February 5, 2015

Nights at the Museum

 
This past weeks theme was museum week. Thursday I went to the Frazier History Museum for the last week of the "Lifestyles of the Rich and Famous" exhibit. This temporary exhibit featured items from the Gilded Age (1870-1915), which was when the United States became the leader in industrialization and the country saw rapid economic growth. Saturday I went to "Science with a Twist" at the Kentucky Science Center. I was the lucky winner of two tickets from a Yelp giveaway! The night was full of fun, food and drinks!


 Lifestyles of the Rich and Famous: Art, Fashion & Luxury in the Gilded Age


I loved this exhibit because many of the items on display were from the Louisville area. Local pieces came from "the collections of the Kentucky Historical Society, The Speed Art Museum, The Filson Historical Society, the Howard Steamboat Museum, the University of Louisville Archives, and numerous private lenders." I love learning about the history of Louisville. Below are pictures of most the dresses and accessories on display along with a few other items.  
 
I need a trunk just like this one :)

 
The dress on the right was one of my favorites 

 
Wedding Dress


Shoes and view down the gallery


Jewels and accessories, yes please!
 
Horse drawn carriage

 
Knife display up the stairs on the second floor.
 
Bourbon anyone?


Science with a Twist: Kentucky Science Center's Annual Fundraising Gala
 

Ice Bar = Coolest bar I've seen 
 
Science with a Twist is the biggest event for the Kentucky Science Center each year. Their goal is to promote and raise funds for early childhood education giving children a strong foundation in science. Science with a Twist recognizes the newest Ambassadors of Science Literacy. A new childhood gallery will open in July to help achieve these goals. Contact the Kentucky Science Center if you would like to donate to the Science in Play campaign or visit their website to make a donation.
 
Ice Carving in the Frozen section


There was also a place to smash liquid nitrogen frozen vegetables, for a donation of course! They aren't going to destroy food for nothing!
 
Shooting Angry Birds

 
Food was provided by Horseshoe Casino

 
Horseshoe Casino also had build your own nachos, sliders and Coney bars! My only problem with the event was figuring out how to play, eat and sip on an adult beverage at the same time. 
 
Build your own desert in the Bourbon & Bricks Lego Lounge 
 
Being a grown-up kid is the best!
 

I had to sneak in a program picture
 
The Jungle Book area had live animal interaction!
 
There were snakes, different lizard species, a turtle, chinchilla, hedgehog, and birds including a peregrine falcon, bald eagle and this beauty!
 
 I wore a dress from Forever 21, shoes from ASOS (similar here), crystal necklace from Louisville's Beaux Bijoux (Edenside Gallery or as Andranbee on Etsy)
and  a vintage Andrew Geller faux ostrich leather handbag. 
 
 
What will you be doing this month? Below are a few ideas of places I would love to go for a night out on the town:
 
 
While my intention with LeaLouLife is to post mostly about natural beauty and health, I know I've been slacking. I am currently working on a 2-3 part series for dental health with two DIY recipes and a post on a natural makeup brand. Stay tuned!